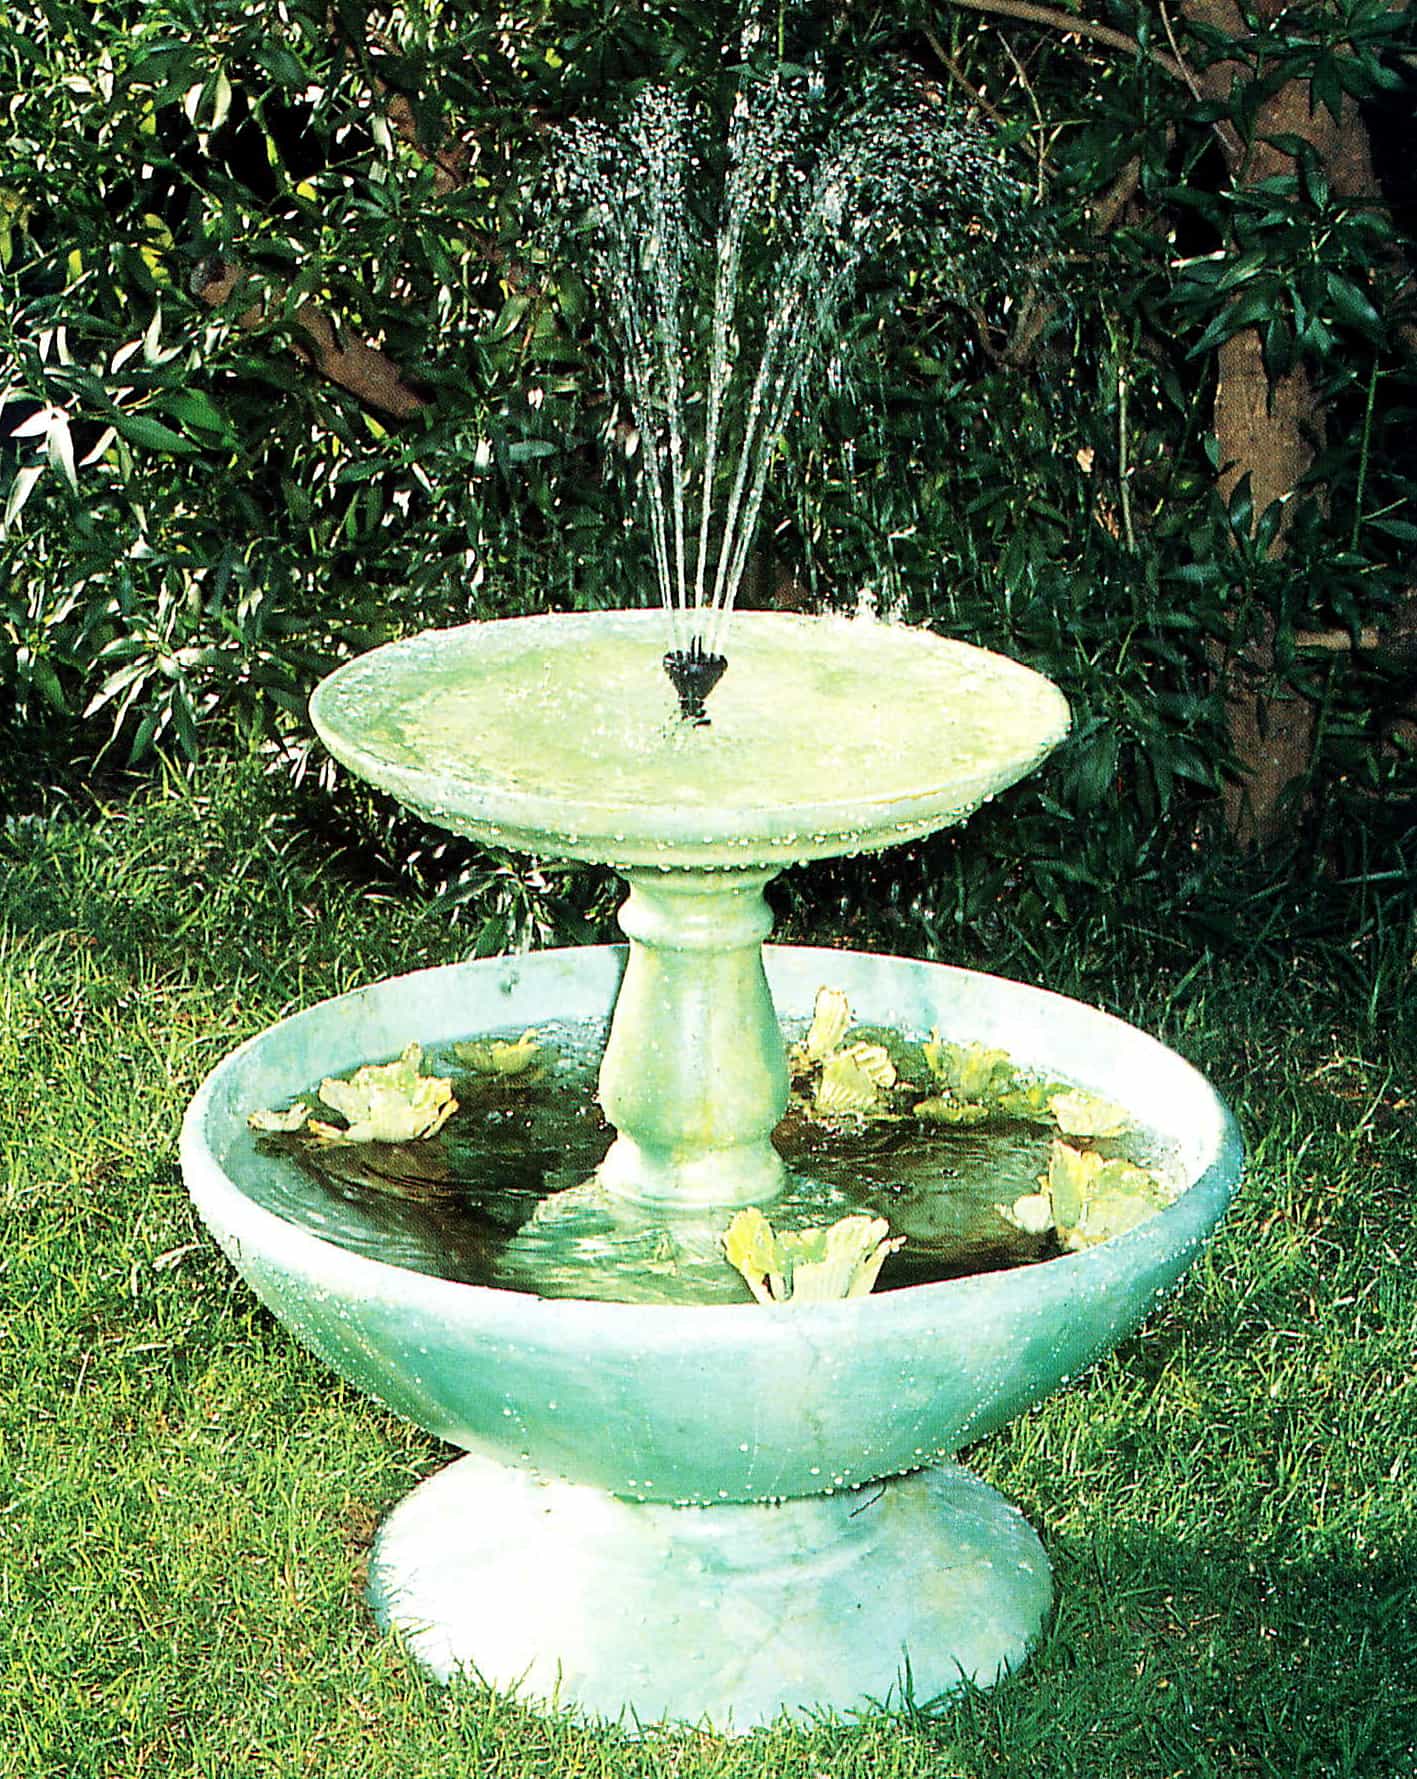
A Simple BirdBath Fountain
This project proves that even the simplest birdbath fountain can make a pleasing and versatile water feature. While most birdbaths are made from precast concrete, this one that I put together over a weekend was molded from much lighter fiber cement, then painted to look like marble.
You will find that most birdbaths are suitable for fountain use, and that many manufacturers of precast products will convert them for you by inserting a pipe or tubing through the stem. Since it is a free-standing unit, this one has been set in a large bowl.
If a catchment bowl is not supplied with the birdbath, use any suitable watertight container, or secure the fountain to a plinth in a pond. Just make sure it does not fall over. Note that the pump which activates the various water lets is hidden in the base of the hollow stem of this bird bath.
Materials
precast birdbath and bowl
1 x 520 mm x 12 mm (20 in x ½ in) flexible tubing
1 x submersible pump, with 700 mm (2 ft 4 in) water head
fountain heads
outdoor cable and conduit
Preparation
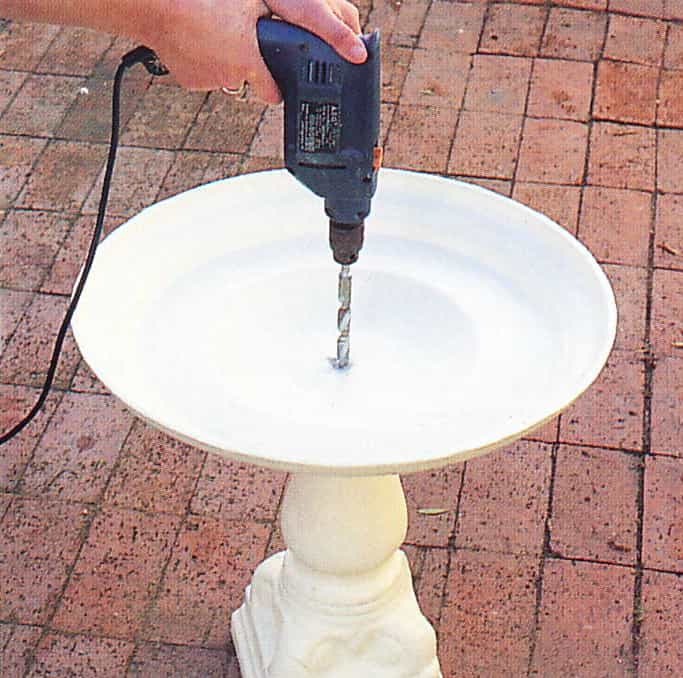
Step 1 – First Drill A Hole
Unless your birdbath has already been converted into a fountain, the first step will be to drill a hole in the center of the upper dish to accommodate the pipework. Remember that 12 mm (½ in) tubing has an exterior diameter of about 16 mm (5/8 in), and the hole should be wide enough to accommodate this. You must also use the correct drill bit for the material you are drilling.
Step 2 – Secure Tubing
Push the tubing through the bottom of the supporting stem and the hole you have drilled in the dish or bowl of the bird bath. Secure it in position with a suitable two-part epoxy putty and, when this is dry, seal the upper surface with silicone or something similar.
Step 3 – Paint
If you want to paint the bird bath, or give it an appropriate paint finish, do so now. Make sure that the paint is water resistant and, if you plan to stock the pond or collecting bowl with fish or plant life, that it is also non-toxic. Rinse the surface thoroughly before filling.
Step 4 – Check Electric Connection
Establish the position of the nearest electrical connection and take the necessary steps to ensure you can operate the fountain safely once it has been installed. You will need a sealed power point close to the fountain, or waterproof cable which runs into the house. If required, enlist the assistance of a qualified electrician.
Here Are Two Cool Solar Fountains For Birdbaths
| Product | Product Description | Star Rating | Check Price |
|---|---|---|---|
 | Solar Fountain - Upgraded Solar Fountain Water Pump, with 10 Nozzles for Bird Bath for outdoors | , https://www.thepondprofessor.com/wp-content/uploads/2021/08/4-half-Stars-AMA-S.jpg, https://www.thepondprofessor.com/wp-content/uploads/2021/08/4-half-Stars-AMA-S.jpg, 4-half-Stars-AMA-S |  |
 | Solar Fountain Pump, Solar Bird Bath Fountain Built-in 1200mAh Battery, with 6 Nozzles, Floating Water Fountains Pump for Birdbath | , https://www.thepondprofessor.com/wp-content/uploads/2021/08/4-half-Stars-AMA-S.jpg, https://www.thepondprofessor.com/wp-content/uploads/2021/08/4-half-Stars-AMA-S.jpg, 4-half-Stars-AMA-S | |
Installation
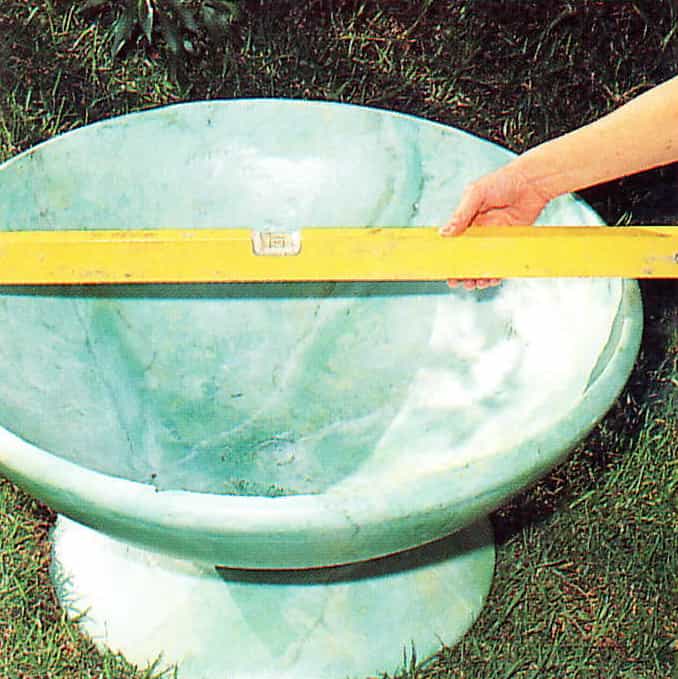
Step 5 – Check Levels
Having decided where your fountain is to be located, check that the site is absolutely level, which is probably the case with an existing hard surface. If you are placing it on an established lawn or in a garden bed, any uneven earth will have to be removed. If it is to be set in an existing pond, you may have to drain the water and build a plinth with bricks and mortar, or you may be able to simply set it on bricks or blocks. If there is any danger of instability, you will have to cement the fountain in place.

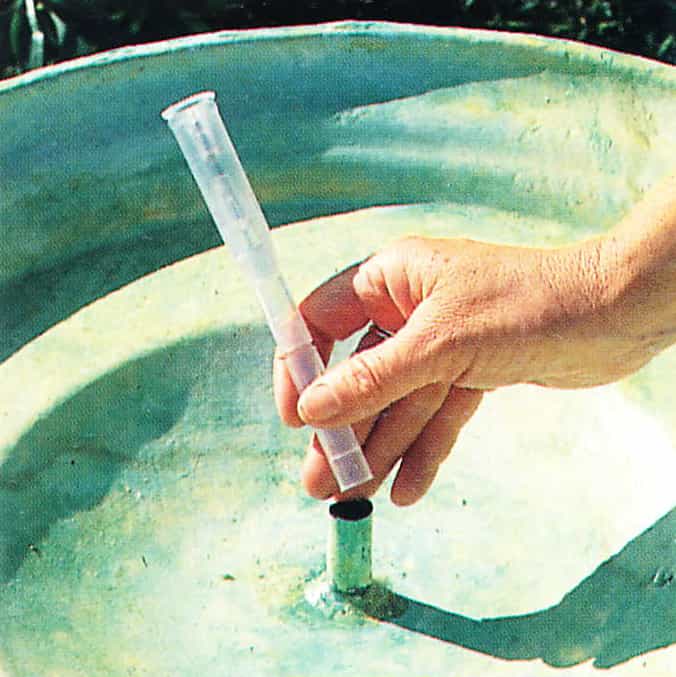
Step 6 – Trim Tubing And Attach
Using a sharp utility knife, trim the tubing which extends out of the dish. Make sure you leave enough exposed to attach the various fountain fittings.
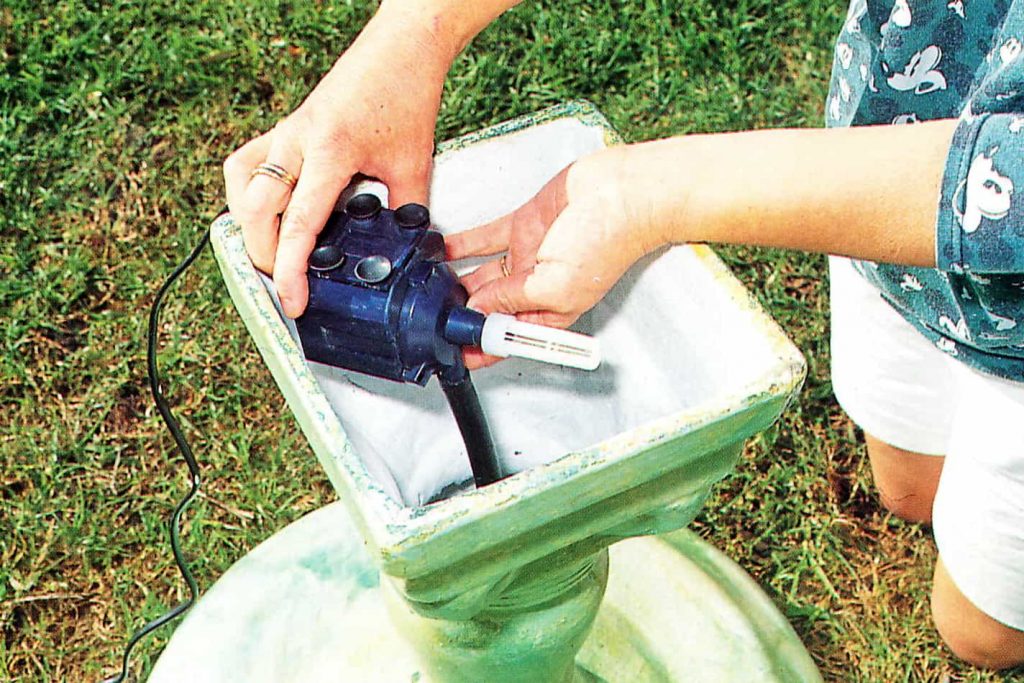
Step 7 – Check Pump Power
Remember that the power of the pump chosen should be compatible with the height of the bird bath; for instance, a pump with a water head of 700 mm (2 ft 4 in) is suitable for this 5OO mm (1 ft 8 in) high design. When attaching the pump, you will probably have to trim the other end of the tubing before joining it to the outlet. If the tubing is not the correct diameter for the outlet, you may have to use a reducer of some sort.
Step 8 – Fill With Water
Now you can fill the catchment bowl below with water.
Operating the fountain
Step 9 – Decide On Nozzle Type
Before you activate the fountain, decide which nozzle jet type you want and slide it onto the pipe.
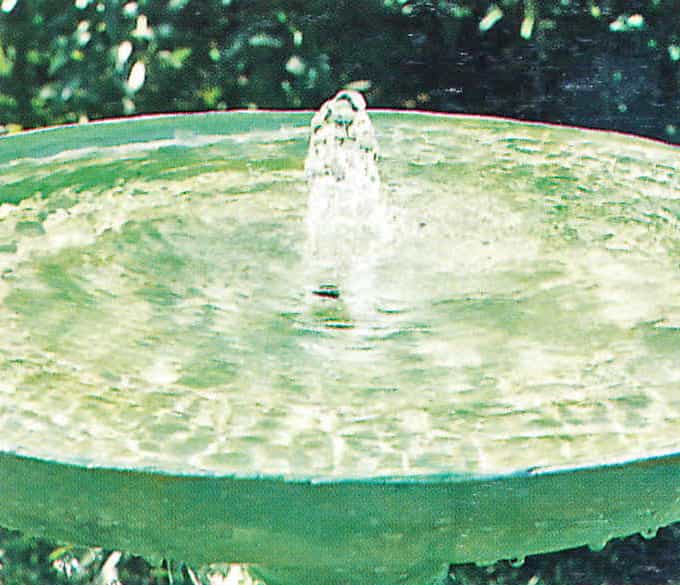
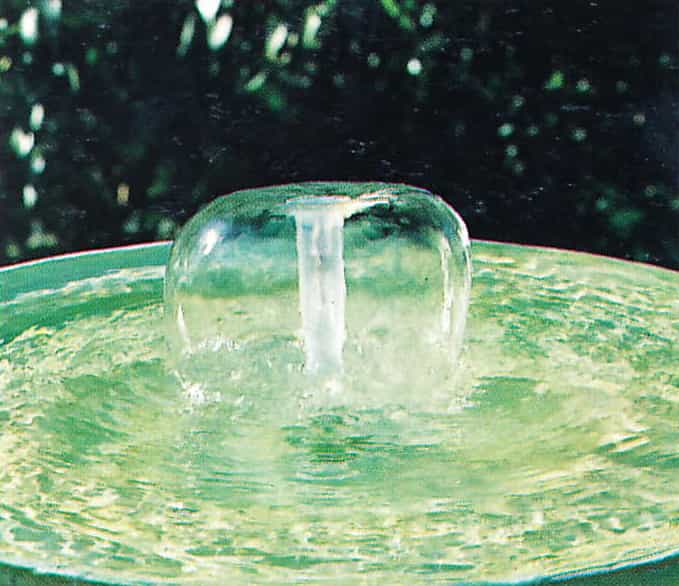
Step 10 – Switch On
Your pump can now be plugged into a power point and switched on. Sit back and enjoy the different patterns your fountain heads create.
Here Are a Few Nozzles for You To Check Out
https://amzn.to/3PqIFAS
NEXT: Precast Fountain Feature >>
<< BACK TO: Step-By-Step


3 Comments