Traditional Japanese Bamboo
Feature Fountain (shishi-odoshi)
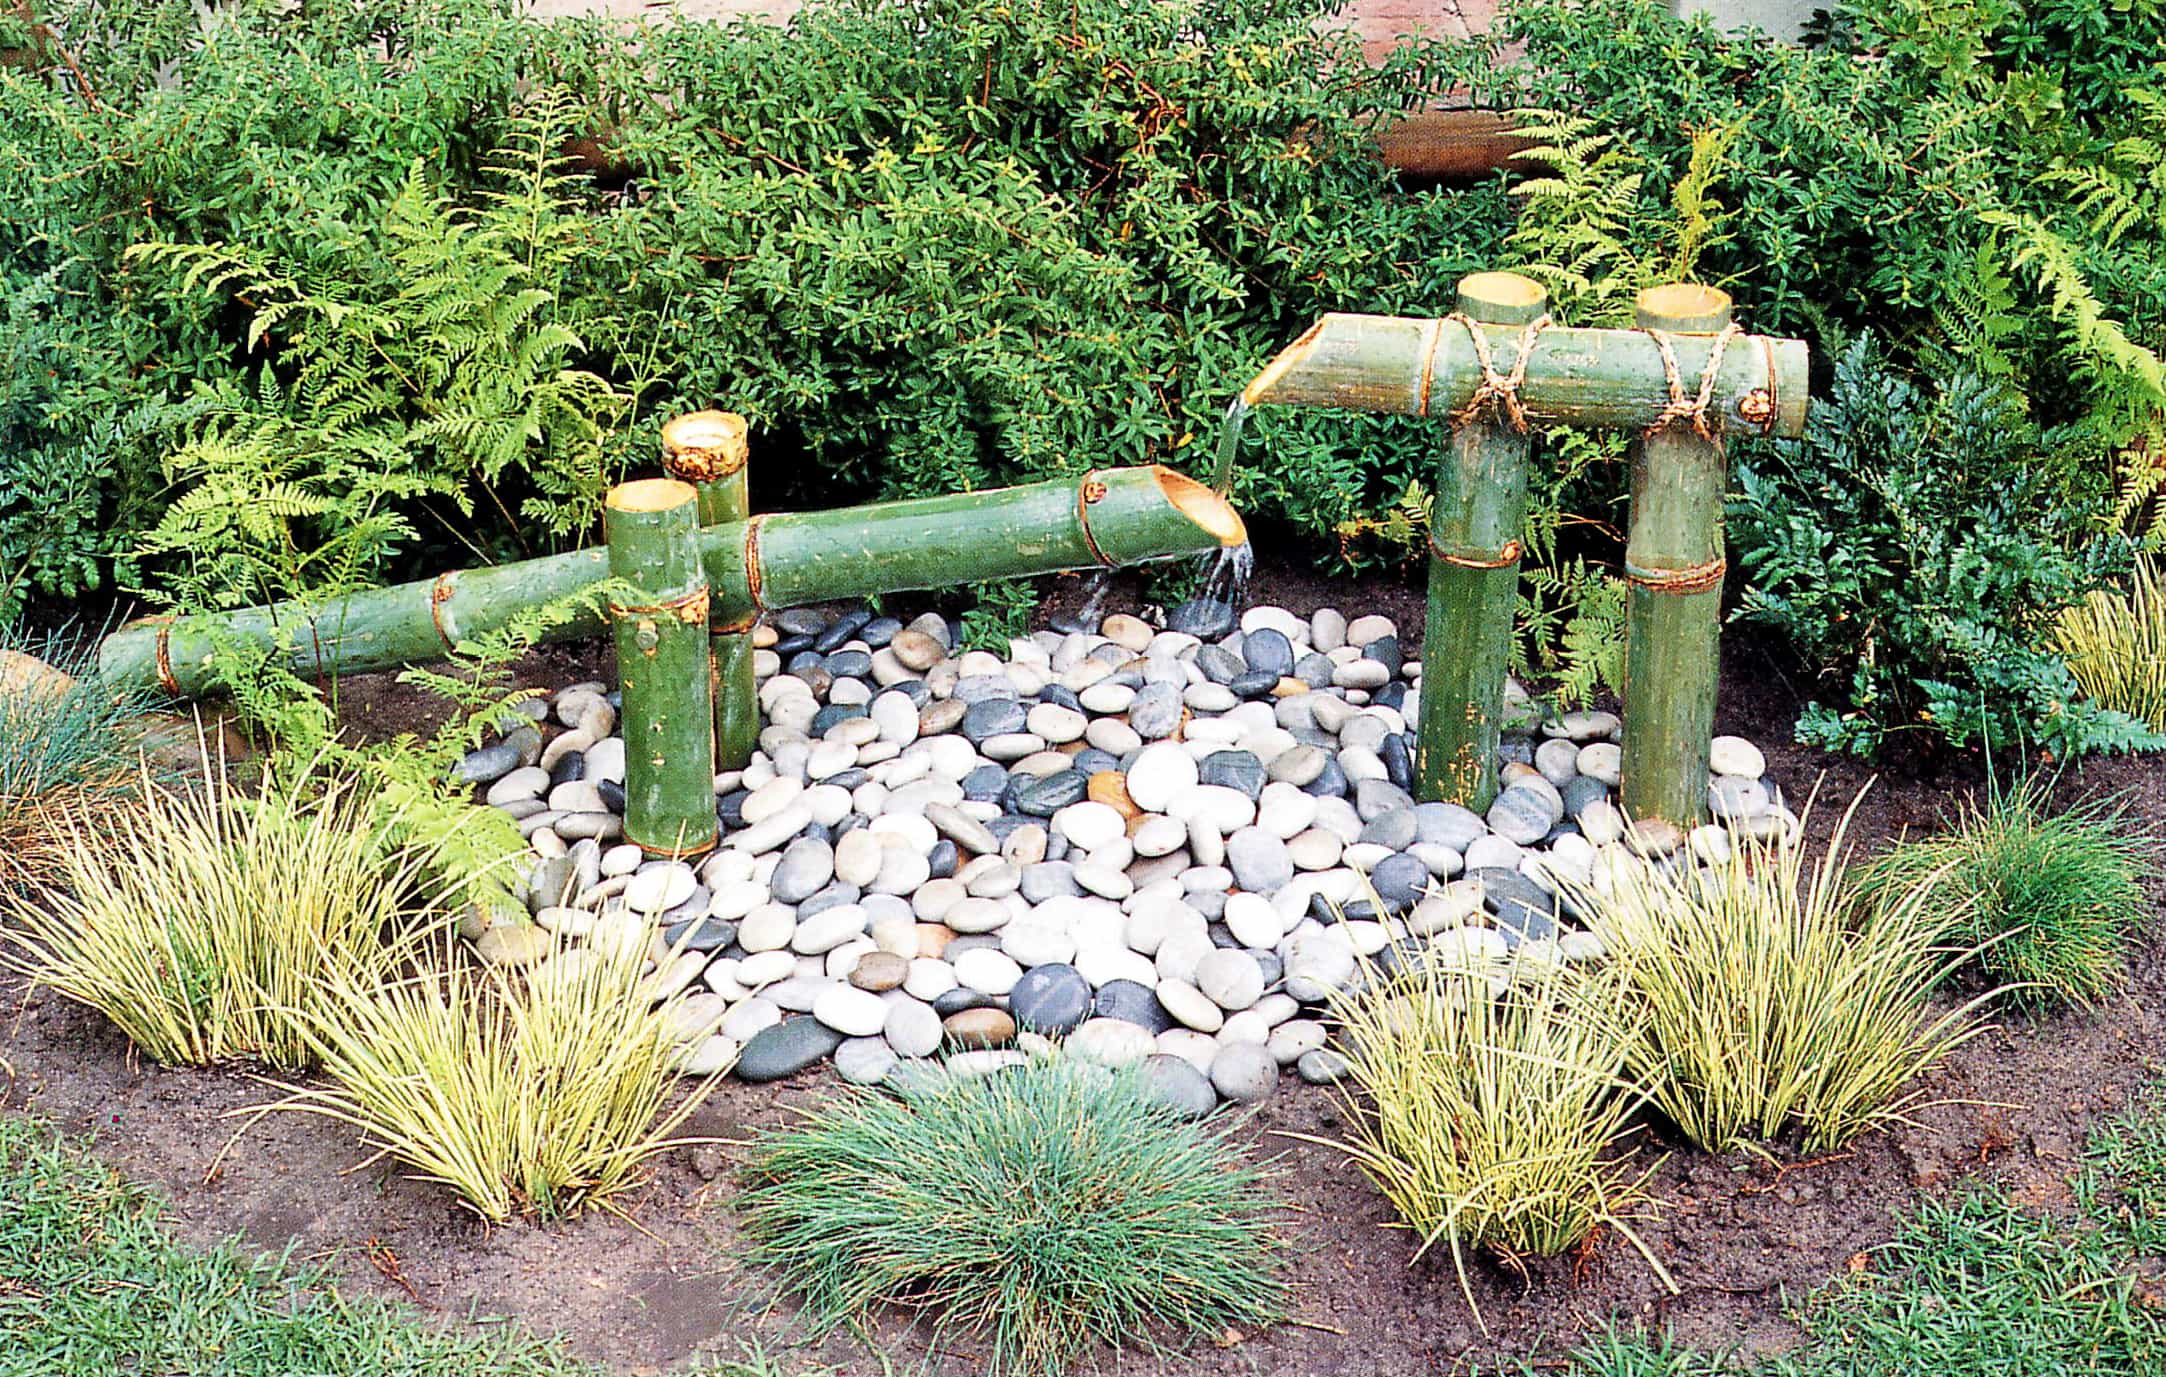
The one DIY project that I always wanted to try is this Japanese Bamboo feature fountain. I came across some good-sized bamboo growing along a river bank not far from where I live. After getting permission from the owner of the land I cut one decent size for my bamboo feature fountain.
This is modeled on a traditional “shishi-odoshi” that in Japan enhances a pebble water garden planted with grasses, bamboo, and suitable shrubs. There is nothing to stop you from erecting it so that the water from the bamboo pipes flows into an appropriately designed koi pond. The green color of bamboo will fade to a characteristic golden brown as it dries, creating a natural effect that complements the simple elements and shapes of this delightful bamboo-feature fountain.
Materials
5 kg (11 lb) cement
20 kg (44 lb) sand
1 x 1 m x 80 mm (3 ft 3 in x 3 ¼ in) length bamboo
2 x 600 mm x 80 mm (2 ft x 3 ¼ in) lengths bamboo
3 x 450 mm x 80 mm (1 ft 5 in x3 ¼ in) lengths bamboo
1 x 260 mm x 10 mm (10 in x 3/8 in) galvanized hexagonal bolt with nut
8 washers
2 m (5 ft 6 in) natural fibre rope string (optional)
1 x 1.5m x 10 mm (5 ft x 3/8 in) flexible tubing
Step 1. Reservoir of Water
Assembling the bamboo feature
Step 2 – Cut your Bamboo
If you have cut your own bamboo, you will now have to saw it to size. Do this with a tenon saw, cutting off an angle of 45° at one end of both the 450 mm (1 ft 6 in) and the 1 m (3 ft 3 in) lengths of bamboo.
| Product | Product Description | Star Rating | Check Price |
|---|---|---|---|
 | 5 Pounds River Rocks, Pebbles, 1-2 Inches Garden Outdoor Decorative Stones | , https://www.thepondprofessor.com/wp-content/uploads/2021/08/4-half-Stars-AMA-S.jpg, https://www.thepondprofessor.com/wp-content/uploads/2021/08/4-half-Stars-AMA-S.jpg, 4-half-Stars-AMA-S |  |
 | 5 Pounds River Rocks, Pebbles, Natural Polished Mixed Color Stones | , https://www.thepondprofessor.com/wp-content/uploads/2021/08/4-half-Stars-AMA-S.jpg, https://www.thepondprofessor.com/wp-content/uploads/2021/08/4-half-Stars-AMA-S.jpg, 4-half-Stars-AMA-S | |
Step 3 – Check the Joint for Drilling holes
To work efficiently, you will have to ensure that there is a natural joint in the longest piece of bamboo, just ahead of where it is bolted (see illustration below). Additional joints between this one and the angled end will have to be drilled out (using a wood drill bit) so that the weight of the water will cause the pivoted bamboo to see-saw. You may also have to drill into the second angled segment to feed through the tubing.
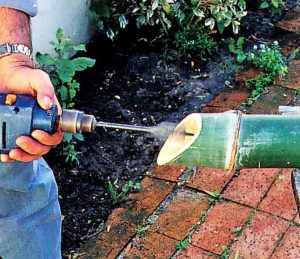
Step 4 – Drill Holes
Drill holes in the remaining two 450 mm (1 ft 6 in) lengths, approximately 100 mm (4 in) from the top, and a hole in the 1 m (3 ft 3 in) length at a point about halfway. Also, drill one of the 600 mm (2 ft) lengths to accommodate the tubing (see illustration below).
Step 5 -Bolt The Pieces
Bolt the three pieces of bamboo together as illustrated, sliding 4 washers between each piece to create two even gaps.
Step 6 – Cut Holes
Cut holes in the two 600 mm (2 ft) lengths of bamboo to support the shorter horizontal length. These should be 150 mm (6 in) from the top of each one and the same diameter as the bamboo it will support (in this case 80 mm or 3 ¼ in). Install the fountain, by tying the three pieces together temporarily with string.
Installing the Bamboo Feature Fountain
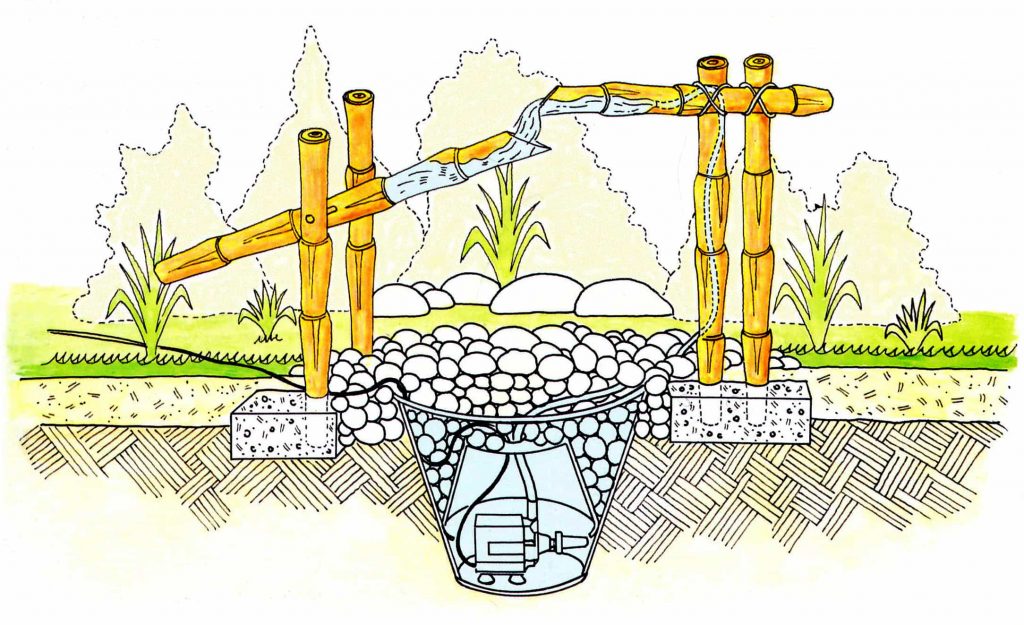
Step 7 – Dig Trenches
Dig two foundation trenches measuring 250 mm x 250 mm x 150 mm (10 in x 10 in x 6 in), and position the bamboo so that the smaller horizontal section of the fountain constantly feeds the one below it with water. The longer, lower, pivoted side has a see-saw action which should spill into the pebble reservoir, while the pieces that are tied together act as a faucet. Use a spirit level to check that the four bamboo posts are standing absolutely upright.
Step 8 – Mix Cement
Now mix the cement and sand in a ratio of 1:4 and add water until it is smooth and porridge-like. There is no need to add stone, as this is a lightweight structure, although you can if you wish. Lift the cement mixture with a spade and pour it into the two trenches. Compact it with the back of the spade. Double-check that the posts are still straight.
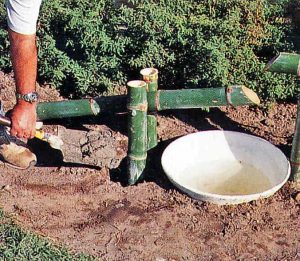
Step 9 – Connect Pump & Tubing
Place the pump in the reservoir bowl with one end of the tubing fixed to the outlet pipe. When the cement has set, push the tubing through the one 600 mm (2 ft) post. Lead the power cable to a waterproof socket box or lay underground conduit.
Step 10 – Secure With Rope
Replace the string with a more sturdy, more attractive rope. Do this by crossing two pieces over on one side and securing them with a reef knot. Use string to neaten the ends if you wish. While you are doing this, use a spirit level to check that the horizontal faucet is straight.
Step 11 – Place Pebbles
River stones and pebbles are now set in position over the reservoir, as with the pebble fountain, except that you may want to spread the pebbles further, rather than creating a circular feature.
Finishing off
Step 12 – Fill With Water
Fill the reservoir with water and plant around the feature with grasses, ferns or miniature bamboo.
NEXT: Crossing Water >>
<< BACK TO: Step-By-Step


6 Comments