Build a Splashing Waterfall
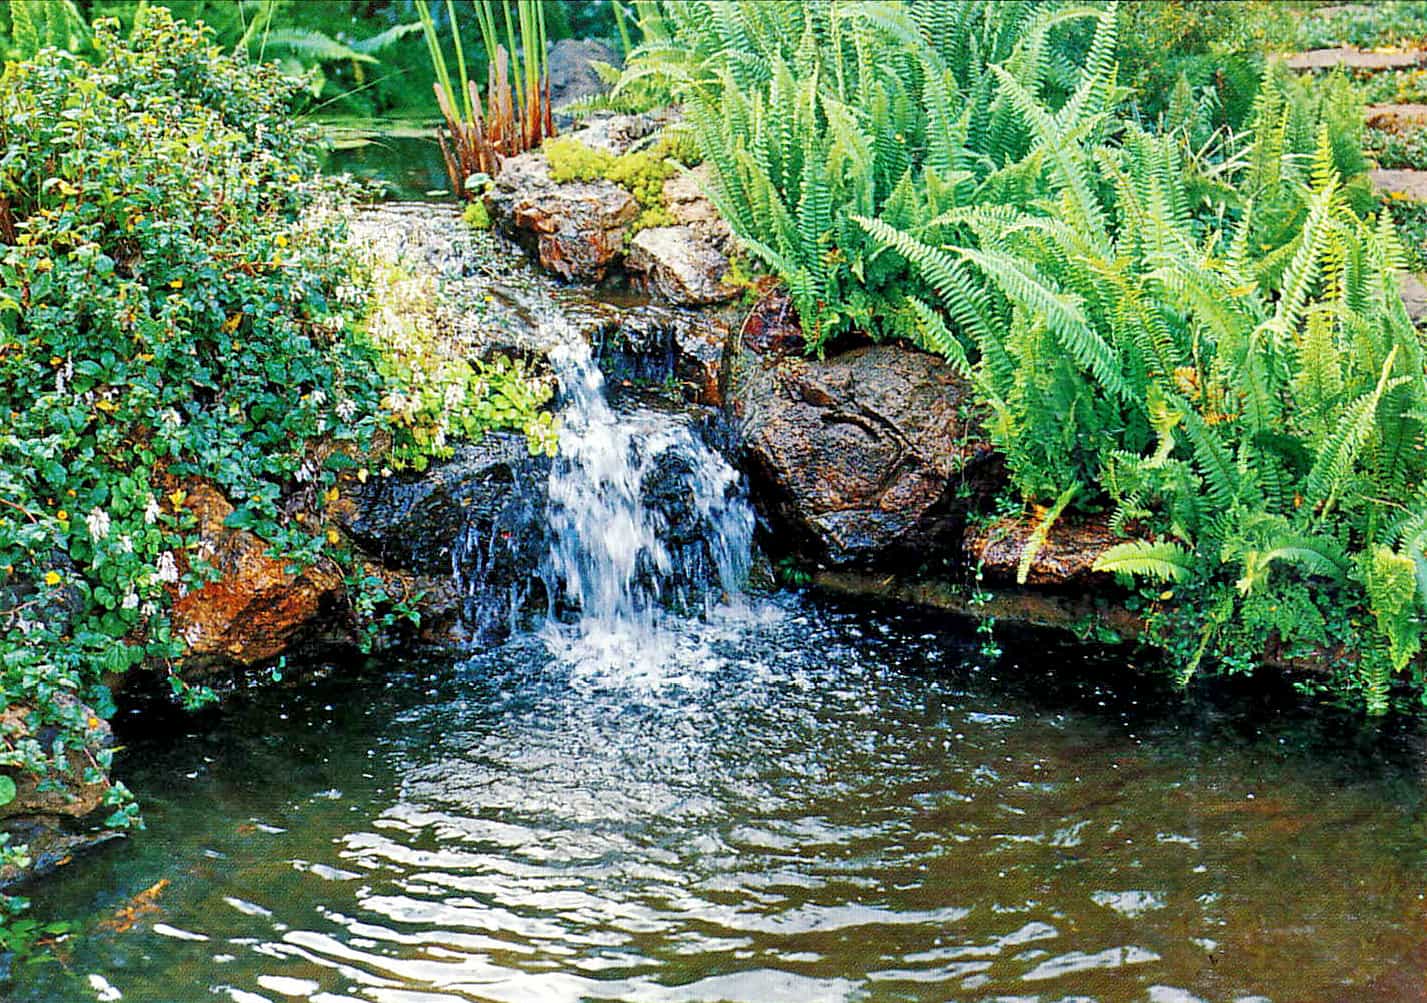
A charming, natural-looking splashing waterfall links two ponds constructed at different levels of a sloping garden. Both ponds were built with concrete and then plastered, and a series of rocks cemented into place around the edges to hide the structure. Plants further soften the effect. The rocks which form the course of the waterfall, have been secured on concrete steps between the ponds. As the concrete has been made impervious, there is no need to waterproof the rocks.
NOTE: Materials quantified are for the waterfall only, and not the ponds.
Materials
120 kg (265 lb) cement
245 kg (0.25 cu yd) sand
245 kg (540 lb) stone
waterproofing additive
large rocks and boulders
10m x20 mm(11 yd x ¾ in) semi-rigid tubing
1 x submersible pump
outdoor cable and conduit
Preparation
Step 1 – Cut three steps
Mark out the position of the rockery and cut three steps into the slope. The dimensions of each step will depend on the size of the boulders you have, as well as the slope. Although instructions are not given here, you should mark out and prepare for construction of the ponds at the same time.
Concrete
Step 2 – Mix Concrete
Concrete the surface of the collecting pond first, then start working from the bottom of the rockery. You will need to mix the cement, sand and stone in the ratio 1:2:2 with waterproofing additive and water. Be sure to use sufficient additive or the waterfall will leak.
Here is an additive for your concrete mix:
[amazon box=”B000HE57ES” template=”horizontal”]
Step 3 – Flat top rocks
You will need at least three large, flat-topped rocks for the rockery, and so it is inevitable you will require assistance. Lay about 100 mm (4 in) of concrete on the lowest step, compact with a straightedge and, while the mixture is still wet, place the first rock in position (see illustration below), so that it slopes forward very slightly.
These flagstone could by useful:
[amazon box=”B07PH2GTLJ” template=”horizontal”]
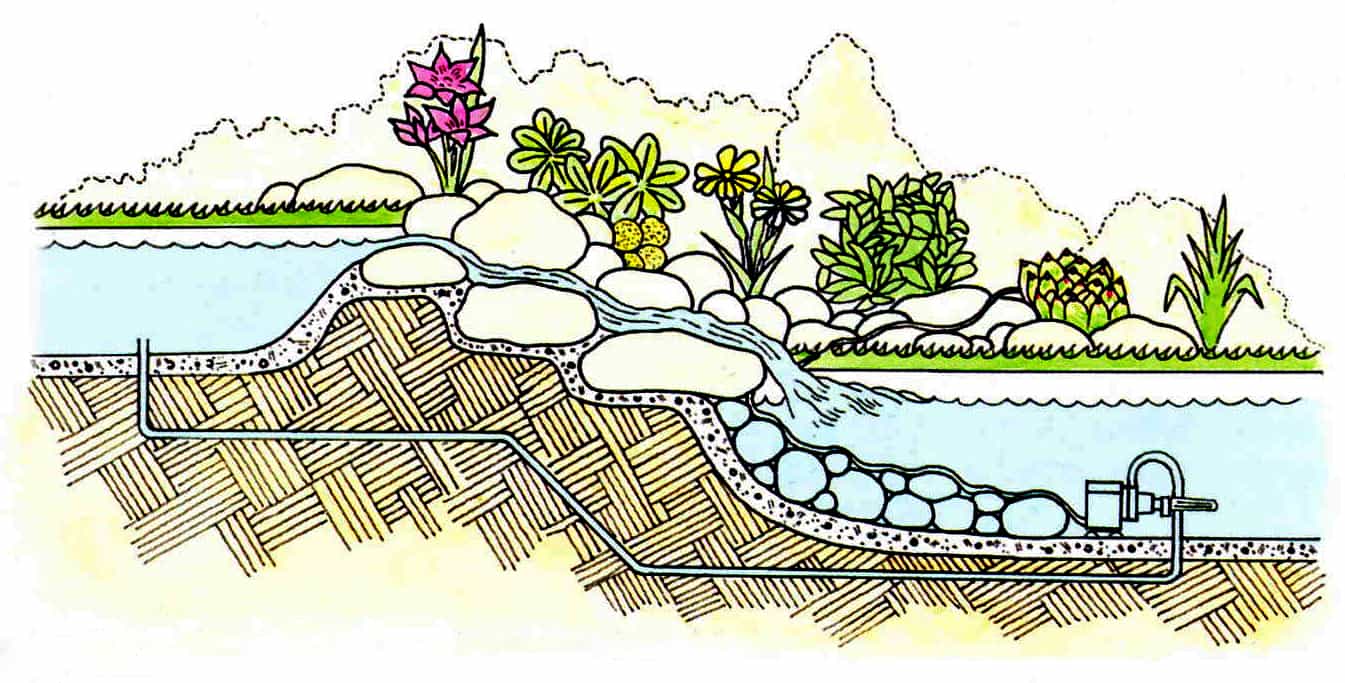
Step 4 – Lay second/third rocks
Concrete around one end of the rock and lay another 100 mm (4 in) of the mixture along the second step. Set the second rock in position, sloping it in the same way as before. Repeat this procedure, using the smallest rock at the top to create your splashing waterfall.
Step 5 – Smaller rocks
Finally concrete smaller rocks into place along the edges of the rockery and around the perimeter of the ponds.
Step 6 – Pump install
The pump may be concealed in the collecting pond and cables run to a waterproof box or the nearest plug point. Make sure it is accessible so that you do not have to wade into the water to remove it for cleaning or repairs.
Step 7 – Connect tubing
Connect the tubing to the pump and run it underground to the top pond, and lead it into the water about 500 mm (1 ft 8 in) from the apex of the waterfall. Switch on and enjoy your splashing waterfall
<< BACK TO: Step-By-Step


2 Comments